
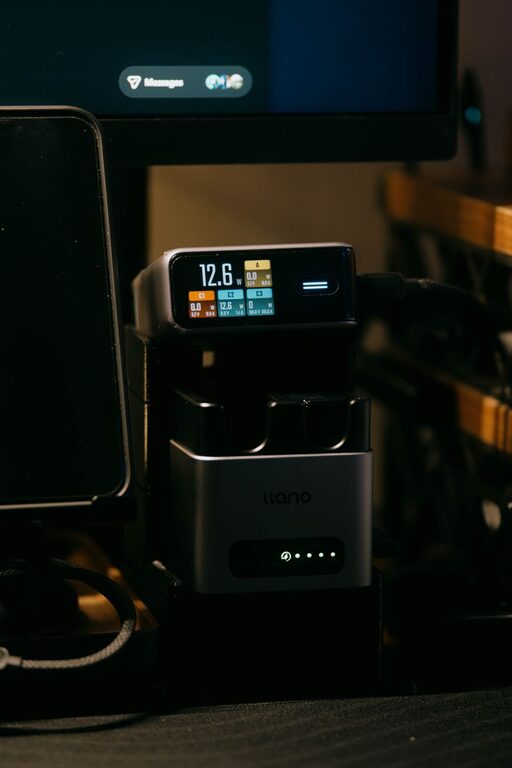
Setting up a dedicated charging station for your devices is a great way to keep your home organized and ensure your gadgets are always powered up when you need them. Whether you have smartphones, tablets, wireless earbuds, or other rechargeable electronics, a charging station helps reduce clutter and makes charging more efficient.
In this guide, we’ll walk you through the key steps to create an effective and neat charging station at home.
Why Set Up a Charging Station?
Many households have multiple devices needing daily charging. Without a designated spot, charging cables and devices often end up scattered across rooms, creating clutter and sometimes confusion about where devices are.
A charging station offers several advantages:
– Keeps all devices in one place
– Reduces tangled cords and clutter
– Makes it easy to locate and charge devices
– Helps extend device and battery life by using proper chargers
– Adds a stylish, organized element to your home
Step 1: Choose the Right Location
The first step is deciding where to place your charging station. Here are some factors to consider:
– Accessibility: Pick a spot that’s easy for everyone in the household to reach, such as a shared living area, kitchen counter, or near your home office.
– Power Outlet Availability: Ensure there are enough outlets nearby to plug in all chargers or use a power strip.
– Surface Space: A small table, shelf, or portion of a desk works well to hold devices while charging.
– Safety: Avoid overly humid areas like bathrooms or places near water to keep electronics safe.
Step 2: Gather Your Supplies
Before setting up, gather all the materials you’ll need:
– Charging cables: Make sure you have cables compatible with your devices (USB-C, Lightning, Micro-USB, etc.).
– Chargers and adapters: Use original or high-quality chargers for safety and optimal charging speed.
– Power strip or multi-port USB charger: A multi-port USB hub or power strip with multiple outlets will allow you to charge several devices at once.
– Charging station organizer: This could be a purpose-built charging dock, a cable organizer box, or simple trays and holders.
– Labeling materials: Optional, but helpful for households with many devices to avoid mix-ups.
Step 3: Organize Cables and Chargers
Cables can be a major source of clutter. Here are some tips to keep them tidy:
– Use cable ties or Velcro straps: Bundle excess cable length to prevent tangles.
– Label cables: Use small tags or stickers to identify which cable belongs to which device.
– Cable clips or holders: Mount these on the surface of the charging station to keep cables in place and easy to grab.
– Cable management boxes: These boxes hide power strips and excess cables, creating a clean look.
Step 4: Arrange Devices Efficiently
Plan how to place devices for charging:
– Use vertical stands or holders: These save space and keep devices visible and upright.
– Separate by device type: Group phones, tablets, smartwatches, and other gadgets together for easy access.
– Leave space for airflow: Give devices room to prevent overheating during charging.
– Keep frequently used devices at the front: This helps grab them quickly without disrupting the station.
Step 5: Choose a Charging Station Setup
There are a variety of setups to consider depending on your needs:
Dedicated Charging Dock
Many manufacturers offer multi-device charging docks designed specifically for phones, watches, and earbuds. These are sleek, compact, and often come with built-in cable management.
Multi-Port USB Chargers
Plug a multi-port USB charger into the power outlet and use separate cables for each device. This setup is flexible and works well if devices have different connection types.
DIY Charging Station
Use a small box or tray to hold the chargers and devices. Drill holes for cables or use cable clips to manage cords. This option is budget-friendly and customizable.
Step 6: Maintain Your Charging Station
To keep your station functional and tidy:
– Regularly check cables for damage and replace if needed.
– Clean the station area to remove dust and debris.
– Rearrange as new devices are added or removed.
– Educate family members on using the station to encourage consistent use.
Bonus Tips for a Better Charging Station
– Invest in fast chargers to reduce charging time.
– Add a small light or indicator if the station is in a dim area.
– Use surge protectors to safeguard devices from electrical damage.
– Consider wireless charging pads for compatible devices to reduce cables further.
– Incorporate a small basket or drawer nearby for storing device accessories like earbuds or cases.
Conclusion
Creating a dedicated charging station for your devices is a simple project that can make daily life more organized and convenient. By selecting the right location, gathering the right supplies, managing cables, and arranging devices thoughtfully, you can keep your gadgets fully charged and your space clutter-free.
Try these steps to build a charging station that fits your home and lifestyle, making device charging easier for everyone in the family.